DJI recently announced their new ZENMUSE X5 and ZENMUSE X5R of Micro Four Thirds Cameras for the Inspire 1 drone system. Featuring increased dynamic range, interchangeable lens compatibility, remote focus and aperture control, and lossless RAW 4K video recording, the ZENMUSE X5 series is ready to take on the high-performance world of aerial photography with two distinct models.

After recording 4K video footage with the two aerial cameras, you may wish to polish the video with some NLE editing program such as iMovie on Mac. But iMovie doesn’t read 4K video with H.265/4K MXF/RAW/XAVC codec perfectly, you may encounter video disordered, picture stunning and some other problems. What should we do to edit Zenmuse X5 X5R 4k video in iMovie smoothly?
The easiest workaround is to convert Zenmuse X5 and X5R 4K footage to a more editing-friendly format, such Apple InterMediate Codec for iMovie. The process is surprisingly easy and can be done with the help of Pavtube 4K Video Converter for Mac. The program lets you convert Zenmuse X5 X5R 4k video to AIC encoded MOV, which ensures maximum editing quality and efficiency when importing videos to iMovie (no matter iMovie HD, iMovie 08, iMovie 09, or iMovie 11) in a few clicks.
- Related Search:Edit Zenmuse X5/X5R 4K in FCP X | Edit Zenmuse X5/X5R 4K in Avid | Edit Zenmuse X5/X5R 4K in Premiere Pro CC | Edit Zenmuse X5/X5R 4K in Premiere Elements 12/13 | Edit Zenmuse X5/X5R 4K in Sony Vegas/Movie Studio 13 | Play Zenmuse X5 and X5R 4K on Mac


Other Download:
- Pavtube old official address: http://www.pavtube.com/hd-video-converter-mac/
- Amazon Store Download: http://www.amazon.com/Pavtube-Video-Converter-Mac-Download/dp/B00QI9GNZS
- AppStore Download: https://itunes.apple.com/de/app/pavtube-hd-video-converter/id502792488?mt=12
- Cnet Download: http://download.cnet.com/Pavtube-HD-Video-Converter/3000-2194_4-76177786.html
Transcode Zenmuse X5/X5R 4k video to AIC for iMovie on Mac
Step 1. Add your raw Zenmuse X5/X5R 4K videos
Run the program you just set up. Drag and drop Zenmuse X5/X5R 4K video files to the converter. You can also hit “Add video” and “Add from folder” buttons to import videos to the app. If you wanna combine several videos into one file, you can click the “Merge into one” beside the preview window.

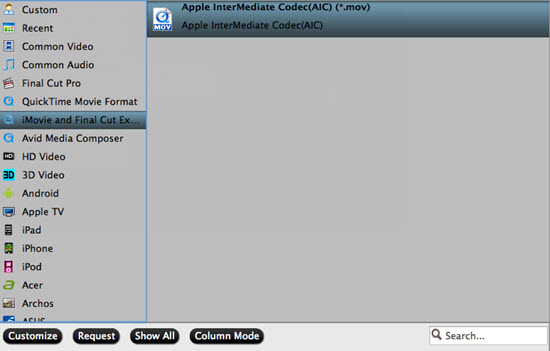
Step 2: Choose the right one for iMovie
Follow my steps to come to the output list, here we can find the suitable one for iMovie. As we mentioned above, we can select the “Apple InterMediate Codec (*.mov)” from the “iMovie/Final Cut Express” item.
Step 3. Adjust settings (Optional)
Before conversion, you can click the “Settings” icon to customize the video/audio settings including the Bitrate of Video and Audio, Audio, Video Size, Sample Rate, Frame Rate, Audio Channels, etc for iMovie. Such a nice functional feature we cannot miss it!
Step 4. Start conversion
In the end, when you finish the preparation work it’s time to hit the “Convert” to get our work ended. After the conversion, click “Open” to locate the result videos and then launch iMovie, choose “File > Import > Movies…”, to import the converted 4K video into iMovie; prepare for editing. You will find that it’s just a piece of cake to edit Panasonic Zenmuse X5/X5R 4K files in iMovie.
More
How to Watch ISO Movies in 3D With Nvidia 3D Vision
How-To: Get TiVo shows onto your Android for on-the-go viewing
H.265 to PPro: Edit Samsung NX1 H.265 in Premiere Pro CC on Mac Yosemite
Best Canon MXF Converter : Ingest Canon MXF into FCE
Convert DJI Inspire 1 4K Files to 1080p for Editing on Mac/PC
Convert and Transfer Sony XDCAM footage to QuickTime MOV on Mac
Can I play Sony XDCAM EX MP4 video with QuickTime
Merge/Join hard drive camera recored MTS videos into one with no conversion
Src
Import Zenmuse X5 and X5R 4K videos to iMovie on Mac
没有评论:
发表评论